小学1年生の僕が、obnizで勉強していること
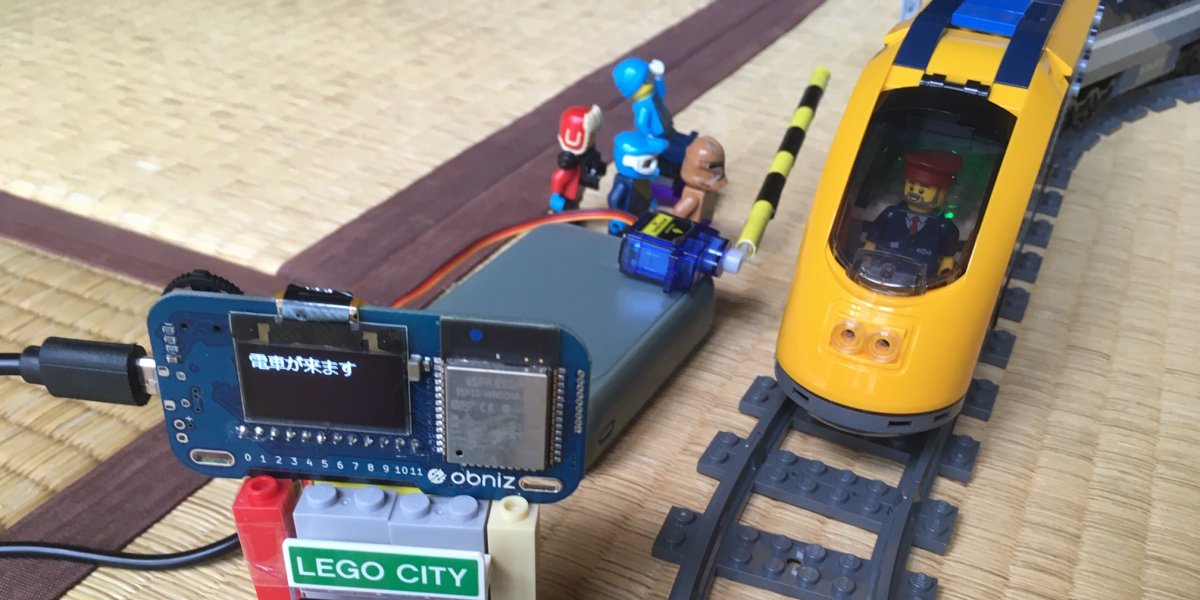
【第2講:解説】踏切(1)
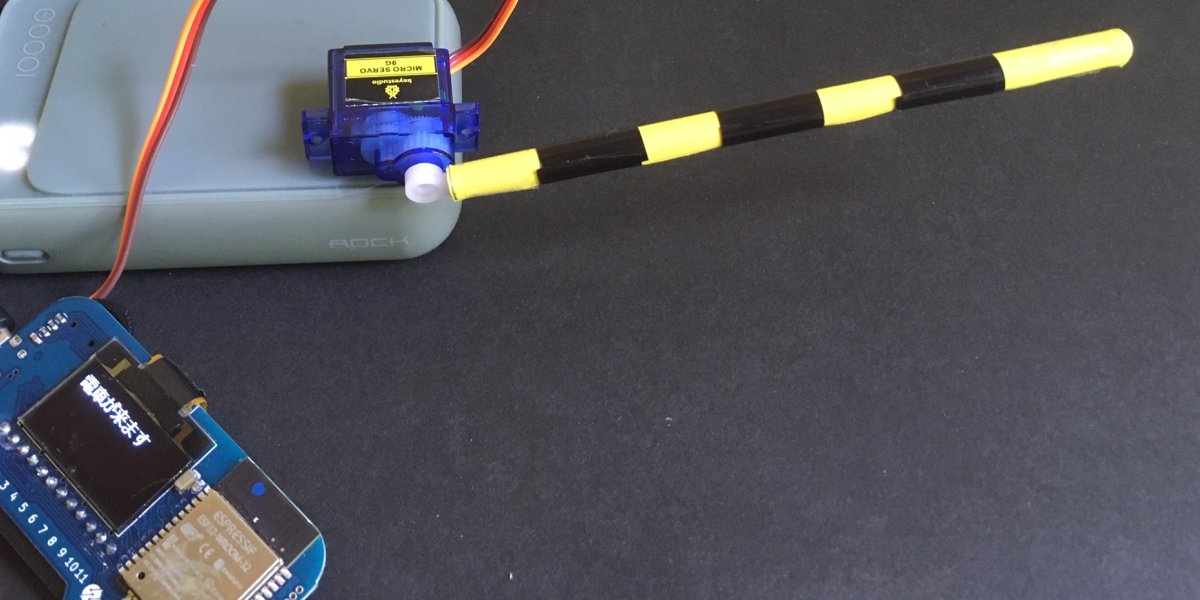
使ったパーツ
サーボモーター操作(1)
サーボモーター用の、サンプルを作ったよ。
プログラム内に少し コメント を入れたから、見やすいかな?
<html>
  <head>
    <meta charset="utf-8" />
    <meta name="viewport" content="width=device-width, initial-scale=1" />
    <link
      rel="stylesheet"
      href="https://stackpath.bootstrapcdn.com/bootstrap/4.3.1/css/bootstrap.min.css"
    />
    <link rel="stylesheet" href="/css/starter-sample.css">
    <script src="https://code.jquery.com/jquery-3.2.1.min.js"></script>
    <script
      src="https://unpkg.com/obniz@3.6.1/obniz.js"
      crossorigin="anonymous"
    ></script>
  </head>
  <body>
    <div id="obniz-debug"></div>

    <div class="wrap">
      <!--角度指定-->
      <div class="print">
        <h3 class="text-center">角度を設定しよう</h3>
        <div>
          <input type="text" id="text" value="" placeholder="ここに角度をいれてから設定→">
          <button class="btn btn-primary" id="moveto">設定</button>
        </div>
      </div>

      <!--電源操作ボタン-->
      <div class="led">
        <h3 class="text-center">電源</h3>
        <button class="btn btn-primary" id="on">電源 ON</button>
        <button class="btn btn-primary" id="off">電源 OFF</button>
      </div>

    </div>

    <script>
      var obniz = new Obniz("OBNIZ_ID_HERE");

      obniz.onconnect = async function() {

        // サーボモーターに接続
        var servo = obniz.wired("ServoMotor", {gnd:0, vcc:1, signal:2});

        // ディスプレイの表示
        obniz.display.clear();
        obniz.display.print("Hello World");

        // [電源 ON]がクリックされた時
        $("#on").click(function() {
          servo.on();
        });

        // [電源 OFF]がクリックされた時
        $("#off").click(function() {
          servo.off();
         });

        // [設定]がクリックされた時
        $("#moveto").on("click", function() {

          // ディスプレイの表示
          obniz.display.clear();
          obniz.display.print("設定角度:");
          obniz.display.print($("#text").val());

          // サーボモーターの角度設定
          servo.angle(parseInt($("#text").val()));  // エラー処理は無し
        });

      };
    </script>
  </body>
</html>
1)サーボモーターの使い方
サーボモーターの使い方は、パーツライブラリを参考にすればできるよ。
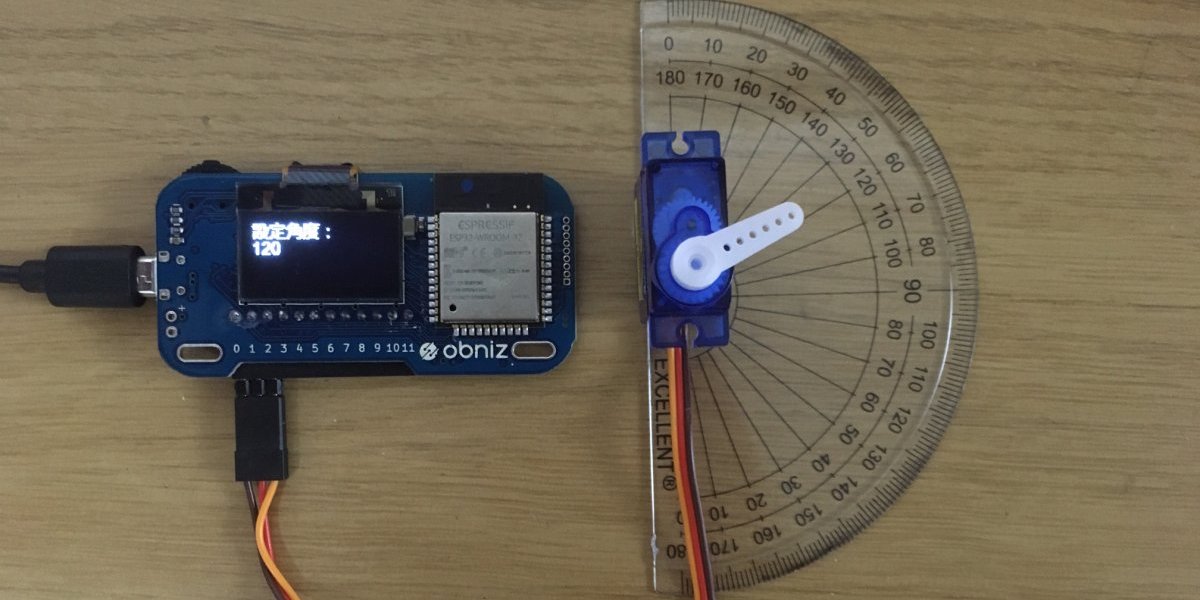
2)角度の設定
角度の設定処理について、説明するよ。画面で角度を指定する部分は、HTML のこの部分だね。
【24行目:角度を入れるところ】
<input type="text" id="text" value="" placeholder="ここに角度をいれてから設定→">
この「<input….>」というのは、HTMLの「inputタグ」と呼ばれるもので、ブラウザ画面で入力するものになるんだよ。
【25行目:[設定]ボタン】
<button class="btn btn-primary" id="moveto">設定</button>
次の「<button…>…</button>」というのは、HTMLの「buttunタグ」と呼ばれるもので、名前の通り、ブラウザ画面でボタンになるのはわかるよね。
このボタンが押された時の、動作は下の方の、JavaScript の部分にあるよね。
【60行目~】
        // [設定]がクリックされた時
        $("#moveto").on("click", function() {

          // ディスプレイの表示
          obniz.display.clear();
          obniz.display.print("設定角度:");
          obniz.display.print($("#text").val());

          // サーボモーターの角度設定
          servo.angle(parseInt($("#text").val()));  // エラー処理は無し
        });
ボタンのidが、「moveto」だから、クリックされた時にここが実行されるんだ。
ディスプレイの表示部分については、一度、ディスプレイをクリア(きれいに)してから、printで文字を出しているね。
「角度設定」の次に出しているのは、「$(“#text”).val()」だね。
「$(“#text”)」というのは、24行目の「inputタグ」が「id=”text”」とあるから、この「inputタグ」のことで、「val」(value)だから、その入力した値のことなんだ。
最期の、サーボモーターの角度設定については、「servo.angle(角度)」で設定できるけど、角度の部分は、「parseInt($(“#text”).val())」となっているね。「$(“#text”).val()」は、「inputタグ」で入力した値だけど、それを「parseInt(…)」というもので、数字にしているんだ。これは、無くても大丈夫だけと、一応おまじないのようなものでつけてるんだよ。
おすすめ
このサイトについて

僕(算哲)が、obnizで遊びながら、 IoT とプログラミングについて勉強したことをまとめるサイトです。

パパは、IT技術者で、算哲の先生です。