小学1年生の僕が、obnizで勉強していること
【第1講:解説】信号機
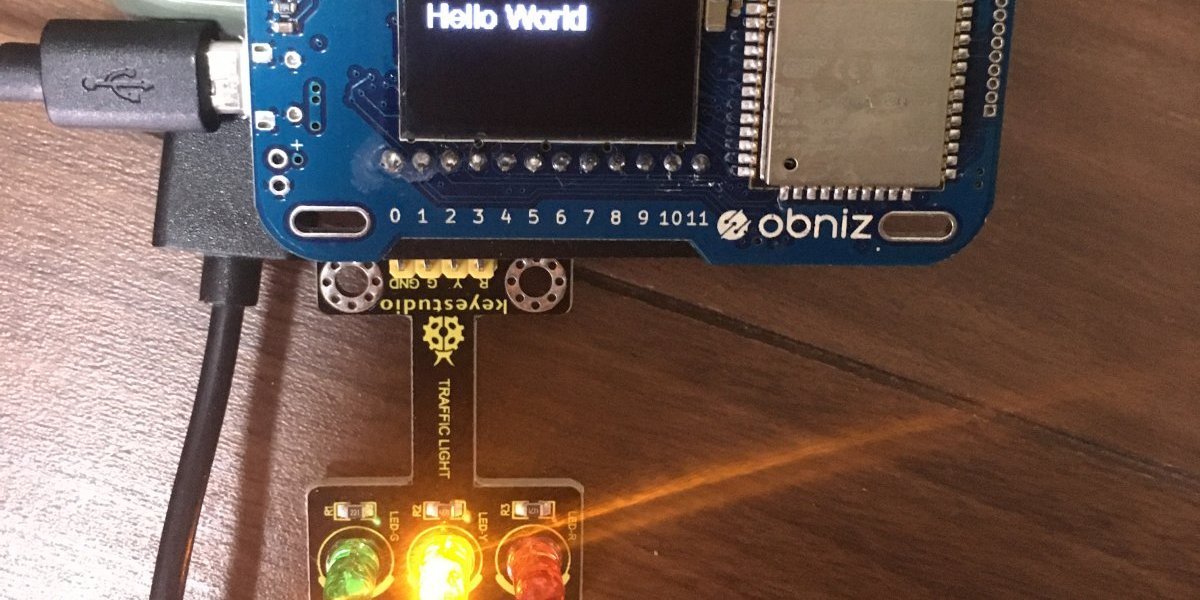
使ったパーツ
第1版:最初にパパが修正したプログラム
公式サイトのLED用のサンプルを、三色LED用に修正したんだよ。
<html>
  <head>
    <meta charset="utf-8" />
    <meta name="viewport" content="width=device-width, initial-scale=1" />
    <link
      rel="stylesheet"
      href="https://stackpath.bootstrapcdn.com/bootstrap/4.3.1/css/bootstrap.min.css"
    />
    <link rel="stylesheet" href="/css/starter-sample.css">
    <script src="https://code.jquery.com/jquery-3.2.1.min.js"></script>
    <script
      src="https://unpkg.com/obniz@3.6.1/obniz.js"
      crossorigin="anonymous"
    ></script>
  </head>
  <body>
    <div id="obniz-debug"></div>

    <!--文字の表示-->
    <div class="wrap">
      <div class="print">
        <h3 class="text-center">Print words on obniz</h3>
        <div>
          <input type="text" id="text" value="Hello World" placeholder="Input in freely">
          <button class="btn btn-primary" id="showtime">Print on obniz</button>
        </div>
      </div>

    <!--ダイヤルスイッチの状態を表示-->
      <div class="switch">
        <h3 class="text-center"> Swtich </h3>
        <span id="print">undefined</span>
      </div>

    <!--LEDのON/OFFボタン-->
      <div class="led">
        <h3 class="text-center">Turning on a LED</h3>
        <button class="btn btn-primary" id="on">LED ON</button>
        <button class="btn btn-primary" id="off">LED OFF</button>
        <dl>
          <dt>Demo Pin assign</dt>
          <dd>- io0:gnd</dd>
          <dd>- io1:green</dd>
          <dd>- io2:yellow</dd>
          <dd>- io3:red</dd>
          <dd>- Switch state will be printed on browser</dd>
        </dl>
      </div>

    </div>

    <script>
      var obniz = new Obniz("OBNIZ_ID_HERE");

      obniz.onconnect = async function() {

        var led = obniz.wired("Keyestudio_TrafficLight", {gnd:0, green:1, yellow:2, red:3});
        obniz.display.clear();
        obniz.display.print("Hello World");

        obniz.switch.onchange = function(state) {
          $("#print").text(state);
          obniz.display.clear();
          obniz.display.print(state);
        };

        $("#showtime").on("click", function() {
          obniz.display.clear();
          obniz.display.print($("#text").val());
        });

        $("#on").click(function() {
          led.green.on();
          led.yellow.on();
          led.red.on();
          obniz.display.clear();
          obniz.display.print("ON");
        });

        $("#off").click(function() {
          led.green.off();
          led.yellow.off();
          led.red.off();
          obniz.display.clear();
          obniz.display.print("OFF");
        });

      };
    </script>
  </body>
</html>
サンプルから変更した部分
1)接続しているデバイスの定義
【直す前】
57行目は、もともとこうだったんだ。
var led = obniz.wired("LED", {anode: 0, cathode: 1});obnizに「接続している(wired)」のは、「LED」で「anode」が「0」番ピン、「cathode」が「1」番ピンということを教えているんだよ。
【直した後】
三色LEDは、「Keyestudio_TrafficLight」というもので、obniz Parts Libraryに使い方があるよ。それを見て、このように直したんだ。
var led = obniz.wired("Keyestudio_TrafficLight", {gnd:0, green:1, yellow:2, red:3});obnizに「接続している(wired)」のは、「Keyestudio_TrafficLight」で、「gnd」 が「0」番ピン、「green」(緑)が「1」番ピン、「yellow」(黄)が「2」番ピン、「red」(赤)が「3」番ピンと言っているんだよ。
2)LEDをONするところ
【直す前】
73-75行目は、もともとこうだったんだ。
led.on();【直した後】
三色LEDの場合は、それぞれの色毎にONするんだよ。
led.green.on();
led.yellow.on();
led.red.on();
3)LEDをOFFするところ
81-83行目も、上のONと同じように修正したんだ。
【直す前】
led.off();【直した後】
led.green.off();
led.yellow.off();
led.red.off();
おすすめ
このサイトについて

僕(算哲)が、obnizで遊びながら、 IoT とプログラミングについて勉強したことをまとめるサイトです。

パパは、IT技術者で、算哲の先生です。